Step by Step Vegetable Garden Guide for Beginners: Planning to Harvest
This post may contain affiliate links. If you purchase through them, I may earn a small commission at no extra cost to you. As an Amazon Associate, I earn from qualifying purchases.
Growing your own vegetables at home doesn’t have to be overwhelming. With a simple step-by-step guide, you can start a productive vegetable garden even if you have no experience. This article is designed to walk you through each part of the process so you know exactly what to do from the start.
5 Quick-Start Garden Plans for Growing Fresh Food at Home (Free PDF)
Get beginner-friendly raised bed garden layout plans, simple container garden ideas, and a flexible salad garden plan you can put to work right away. Perfect for small spaces, patios, and first-season growers.
Instant email delivery • Unsubscribe anytime
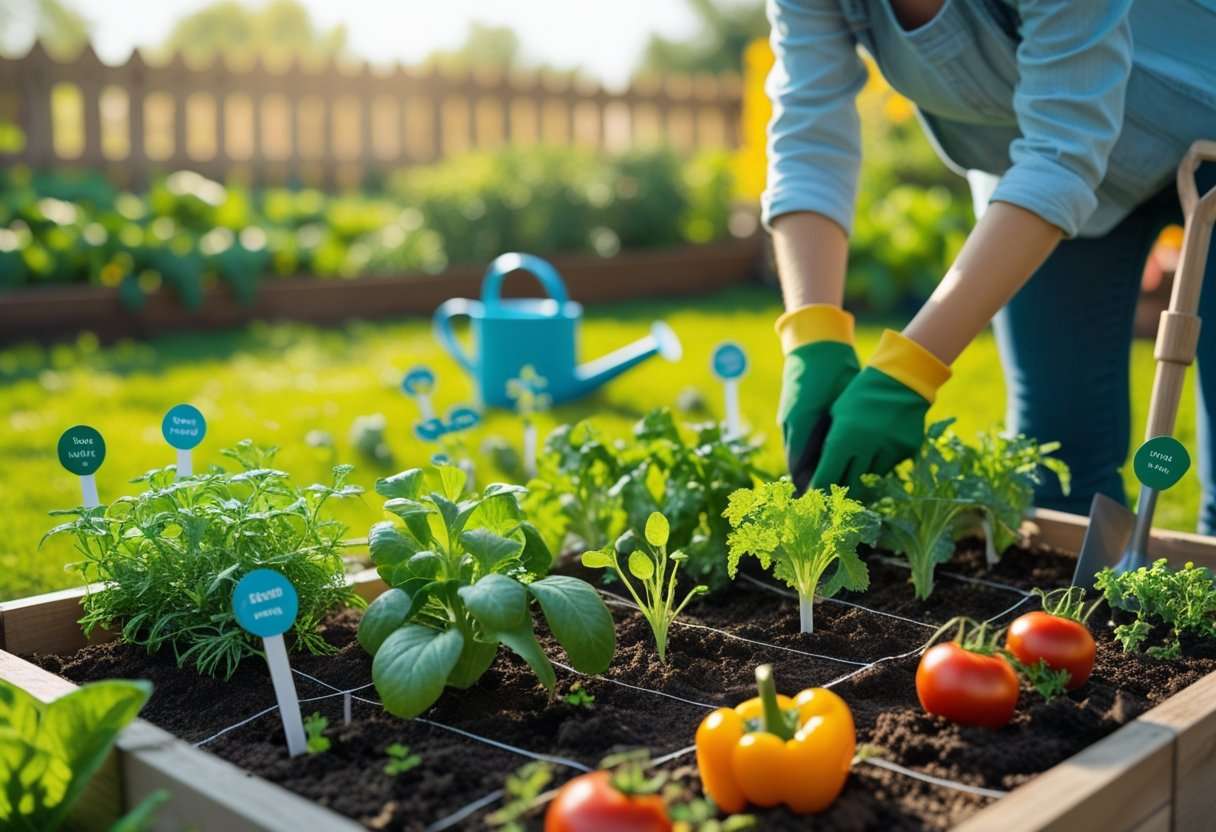
Whether you have a large backyard, a small patch of ground, or even just some containers, successful gardening begins with knowing your local conditions and choosing the right spot. You’ll learn easy ways to prepare your space, select beginner-friendly veggies, and make sure your plants get what they need to grow strong and healthy.
Key Takeaways
- Start with a simple plan tailored to your space and climate
- Use basic tools, proper soil, and beginner-friendly plants
- Follow best practices for planting, care, and harvesting
Understanding Your Local Conditions

Knowing your local growing environment is key to a healthy vegetable garden. Focus on the USDA hardiness zone and frost dates to guide your planting choices and schedule.
Want to Grow Fresh Food at Home?
Grab the Beginner’s Guide to Thriving Gardens—your step-by-step plan to grow real food in any backyard, patio, or balcony. Perfect for first-time gardeners!
Buy the Ebook for $14Includes 7 free bonus guides • Instant download • Beginner-friendly
Identifying Your USDA Hardiness Zone
Your USDA hardiness zone shows what plants are most likely to survive year-round outside. This zone is based on the average lowest winter temperature in your area.
You can find your zone on the USDA website or on most seed company sites. Common garden centers also display this information on seed packets and plant tags. Zones are numbered from 1 (coldest) to 13 (warmest). For example, if you live in zone 6, look for vegetables rated for zone 6 or lower since they will handle your winter temps.
Picking vegetables that match your hardiness zone gives your plants a better shot at survival. Warm weather crops, like peppers, may not grow well in zones with shorter, cooler seasons. Hardier vegetables, such as kale or spinach, handle frost and cold better, making them safer bets for northern zones.
Matching your garden to the right zone helps avoid wasted effort and ensures a better harvest. If you want more details about finding and using your USDA zone, see this step-by-step vegetable gardening guide.
Determining First and Last Frost Dates
First and last frost dates tell you when it is usually safe to plant outside and when you should expect cold temps that can kill sensitive plants. These dates depend on your local climate and may change a little every year.
To find your frost dates, check online weather tools or use tables from your local extension office. For example, if your last spring frost is around May 10, you should wait until after this date to plant crops like tomatoes outside.
Knowing frost dates allows you to plan your sowing and transplanting schedule. Some cool-season plants (lettuce, peas, broccoli) can go out a few weeks before the last frost. Tender crops (cucumbers, beans, squash) wait until all frost risk has passed.
In the fall, stop planting new crops about 2-3 months before your first expected frost date. That way, vegetables have enough time to grow and mature before freezing temperatures arrive. For more tips on planning with frost dates, try this easy beginner garden guide.
Choosing the Right Garden Space

Picking where you grow your vegetables shapes how much you harvest and how easy your garden will be to care for. Sunlight, drainage, and the type of garden setup all play a big part in your garden’s success.
Want to Grow Fresh Food at Home?
Grab the Beginner’s Guide to Thriving Gardens—your step-by-step plan to grow real food in any backyard, patio, or balcony. Perfect for first-time gardeners!
Buy the Ebook for $14Includes 7 free bonus guides • Instant download • Beginner-friendly
Assessing Sunlight and Drainage
Most vegetables need at least 6–8 hours of direct sunlight each day. Watch your yard to see which spots get the most sun from morning to afternoon. Too much shade can lead to weak, spindly plants and low harvests.
Soil drainage is just as important. After heavy rain, notice where water pools or drains quickly. Standing water will rot plant roots, so skip low, soggy spots. Look for slightly raised ground, or use raised garden beds to improve poor drainage.
Quick checklist:
- Track sun hours using a phone app or simple notebook.
- Test drainage by digging a small hole, filling it with water, and watching how fast it drains.
- Avoid planting near large trees that cast shade or steal nutrients.
Healthy soil and steady sunlight create the best start for your vegetables.
Deciding Between In-Ground, Raised Beds, or Containers
You can use an in-ground garden, raised beds, or a container garden depending on your space and needs. Each method has pros and cons.
| Garden Type | Best For | Cons |
|---|---|---|
| In-ground | Large areas, deep soil | Soil can be hard to improve, weeds common |
| Raised garden beds | Poor soil, wet yards, flexibility | Some cost and building required |
| Container garden | Patios, balconies, mobility | Needs more watering, plants can outgrow pots |
Raised beds allow you to fill the box with rich soil and control drainage. In-ground gardens are budget-friendly but need healthy soil to start. Container gardens suit small spaces and are easy to move but dry out quickly.
Choose the method that matches your yard, how much you want to spend, and how much work you are ready to do. For more on layouts and getting started, this complete guide to vegetable garden planning offers detailed tips.
Essential Gardening Tools and Materials
Having the right tools makes each task in your vegetable garden easier and helps keep your plants healthy. Using good tools and basic safety gear protects your body and your plants.
Core Gardening Tools for Beginners
Your first set of tools should make common jobs simple. A hand trowel is useful for digging small holes, transplanting seedlings, and removing weeds. Look for a sturdy metal blade and a non-slip grip. A garden fork is great for loosening soil and mixing in compost. Choose one with strong, square-tipped tines.
A garden spade is needed for digging beds and edging. Make sure the blade is sharp and the handle is comfortable. Garden shears or secateurs help cut stems, harvest herbs, or shape plants. Pick a pair with a comfortable grip and sharp bypass blades.
You will also need a watering can with a fine spray or a hose to water young plants gently. A hoe can help you clear weeds and break up soil. A rake is helpful for smoothing soil and removing debris. Large jobs like moving soil or compost are done best with a wheelbarrow.
For more detailed information on must-have gardening tools, you can refer to this step-by-step guide to vegetable garden tools.
Protective Gear and Maintenance Supplies
Gardening can be tough on your hands and joints. Gardening gloves protect you from cuts, blisters, and thorns. Pick a pair that fits well and is made from breathable, strong material. If you work on your knees, a kneeling pad or gardening mat will reduce stress on your joints.
Want to Grow Fresh Food at Home?
Grab the Beginner’s Guide to Thriving Gardens—your step-by-step plan to grow real food in any backyard, patio, or balcony. Perfect for first-time gardeners!
Buy the Ebook for $14Includes 7 free bonus guides • Instant download • Beginner-friendly
It is important to keep your tools clean and sharp. Use a stiff brush to remove soil and a file or sharpening stone for blades like shears and trowels. Store tools in a dry place to prevent rust.
For safety, wearing long sleeves and a sun hat can help prevent sunburn. Keep a bottle of water nearby to stay hydrated while you work. Following these steps will make gardening safer and more comfortable for you and help your tools last longer.
Preparing the Garden Site
Getting your garden bed ready is key for healthy plant growth and good yields. Focus on removing obstacles and giving your vegetables the best possible soil and setup.
Clearing and Marking the Area
Start by removing all grass, weeds, rocks, and debris from your chosen site. Use a shovel, hoe, or garden fork to pull weeds out by the roots. Clear away sticks and stones to make the area level.
Mark the layout of your garden bed with sticks, stakes, or string. This helps you see the size and shape before you begin digging. Make sure your garden bed location gets at least six hours of direct sunlight each day.
Check the site for any low or uneven spots. Level these out using a rake to avoid water pooling in parts of the bed. If nearby trees or large shrubs shade the area, trim back branches to allow more sunlight.
If the soil is hard or packed, use a garden fork to loosen it about 12 inches deep. This step helps roots grow deeper and makes planting easier. Read more about site prep in this step-by-step garden guide for beginners.
Building and Filling Raised Garden Beds
Raised garden beds help improve drainage and give you more control over soil quality. Build your frames from rot-resistant wood, bricks, or even recycled materials. Standard beds are usually 4 feet wide and 6 to 8 inches deep, but you can adjust the size as needed.
Place your raised beds on cleared, level ground. Secure the corners tightly so the frame holds its shape. Fill your garden bed with a mix of organic compost, topsoil, and well-rotted manure. This blend boosts nutrients and holds moisture for the plants.
Layer rough material like twigs or straw on the bottom to help with drainage. Fill the bed to the top, then water it well and let it settle for a few days before planting. Raised beds also make weeding and caring for plants easier. For more tips on raised garden bed setup, visit this complete vegetable gardening guide for beginners.
Soil Testing and Improvement
Before planting your vegetable garden, test your soil to find out what nutrients it needs and how to improve its condition. Adding the right kinds of organic matter helps your plants grow strong and healthy.
Conducting a Soil Test
A soil test helps you understand the pH, nutrient levels, and structure of your garden soil. To start, use a clean trowel to collect small samples of soil from several spots in your garden. Mix the samples in a clean bucket for a good average.
Remove any rocks, leaves, or sticks from the soil. Take about one cup of mixed soil and place it in a labeled bag. You can use a DIY soil test kit or send the sample to a professional lab for more accurate results.
Typical results show pH and levels of main nutrients such as nitrogen, phosphorus, and potassium. Vegetables usually grow best in a pH between 6.0 and 7.0. When you get your results, follow the recommendations to adjust soil nutrients or pH as needed. For a detailed step-by-step process, check out this step-by-step guide to soil testing for gardeners.
Enhancing Soil Quality with Organic Matter
Good soil is loose, drains well, and holds moisture. You can improve your soil by adding organic matter such as compost or well-rotted manure. These materials increase the amount of nutrients and help improve soil structure.
Each year, spread a 2- to 3-inch layer of compost over your garden and mix it into the top few inches of soil. This helps create a healthy root zone for your plants and boosts good bacteria and earthworms.
Adding mulch on top can also feed your soil as it breaks down. For more tips on using organic matter and compost, visit this step-by-step vegetable garden guide.
Selecting Vegetables and Herbs to Grow
Choosing which vegetables and herbs to plant is one of the most important steps in starting your garden. Matching your choices to your climate, space, and needs helps you achieve a healthy, productive vegetable garden.
Best Vegetables for Beginners
If you’re new to gardening, starting with easy and reliable crops can set you up for success. Good options include leafy greens like lettuce and spinach, which grow quickly and can be picked often. Radishes are also quick growers, taking only about a month from seed to harvest.
Carrots, green beans, and zucchini are popular because they need little care and give steady yields. Tomatoes and peppers are favorites for their taste, but they need warm weather and some support. Cucumbers are productive and do well on a fence or trellis.
Here’s a list of vegetables often recommended for beginners:
- Lettuce
- Spinach
- Radishes
- Carrots
- Tomatoes
- Peppers
- Green beans
- Zucchini
- Cucumbers
Some, like beans, will even add nitrogen to your soil, supporting future plants. For more tips, you can read this step-by-step guide to starting a vegetable garden.
Considering Seasonal and Climate Factors
Each vegetable has its own preferences for temperature and sunlight. For example, leafy greens and spinach grow best in cool weather. Lettuce and onions can be started early in the spring. Radishes are also cold hardy.
Warm-season crops like tomatoes, peppers, and zucchini grow best once the nights are warm and there’s no risk of frost. These plants need six to eight hours of sun each day and protection from cold winds.
Plan your planting dates so cool-weather vegetables like greens and carrots can be planted in early spring or late summer, while heat-loving crops go in after the last spring frost. You can find more specific advice for matching plants to your season and climate in this vegetable gardening guide for beginners.
Incorporating Herbs and Companion Plants
Adding herbs to your garden gives you fresh flavors and helps your vegetables, too. Basil is a favorite herb to plant near tomatoes because it may improve growth and flavor. Parsley, chives, and cilantro also grow well alongside vegetables.
Companion planting means growing certain plants together for better growth or fewer pests. For example, planting onions with carrots can help protect both crops from bugs. Marigolds are flowers that deter some pests when planted between vegetables.
Choose herbs that you like to cook with and place them close to the vegetables they support. Growing a mix of herbs, greens, and companion flowers will boost both your garden’s health and your harvest of homegrown vegetables. To learn more, visit this detailed vegetable planting guide with companion tips.
Planting: Seeds, Seedlings, and Spacing
When planting a vegetable garden, it’s vital to know the right method for each plant. Whether you are sowing seeds directly in the garden, transplanting young plants, or starting seeds indoors, each step requires careful attention to detail for the best results.
Direct Sowing Seeds
For many vegetables like beans, carrots, and radishes, you can plant seeds straight into the ground. Before sowing, make sure your soil is loose and free of weeds. Use a rake to even out the soil surface. Read the instructions on the seed packet for the correct depth and spacing for each vegetable.
Most seeds should be planted at a depth about twice their width. After planting, gently cover the seeds with soil and water lightly. Keep the soil moist until the seeds sprout. To avoid planting seeds too close together, you can use a ruler or a simple board to mark rows. Thin seedlings if they grow too close, keeping only the strongest ones. Some seeds, like lettuce or spinach, do best with succession sowing every couple of weeks for a steady harvest.
Transplanting Seedlings
Transplanting is the process of moving young plants, or seedlings, into their final spot in the garden. Seedlings should be sturdy, healthy, and have at least two sets of true leaves before being moved. Before transplanting, “harden off” your seedlings by exposing them to outdoor conditions a little longer each day for about a week. This step helps reduce transplant shock and improves survival, as explained in this step-by-step guide.
Dig holes large enough for the root ball and space the plants according to instructions for their type. Gently remove seedlings from their containers, keeping as much soil on the roots as possible. After placing them in the ground, fill in with soil and press lightly around the base, then water well.
Starting Seeds Indoors
Starting seeds indoors lets you get a head start on vegetables that need a long growing season or are sensitive to cold. Use clean containers with drainage holes and a fine-textured seed-starting mix, not regular garden soil. Plant seeds at the recommended depth and gently water so the soil stays moist but not soggy.
Provide plenty of light with a sunny windowsill or grow lights positioned a few inches above the seedlings. Some gardeners use a heating mat to keep the soil warm, which can improve germination for crops like tomatoes and peppers, as suggested in this seed starting guide. When seedlings develop their first true leaves and the outdoor weather warms up, begin the hardening-off process so they can be transplanted safely into your garden.
Watering and Managing Moisture
Giving your plants enough water while avoiding too much is important for a healthy garden. You’ll need to check the soil often and adjust how you water based on weather, plant type, and where your vegetables are growing.
Establishing a Watering Routine
Vegetables do best with consistent watering. Most gardens need about 1 inch (2.5 cm) of water per week, including rain. Use a rain gauge or empty can to track rainfall and know when to add more.
Morning is the best time to water. This helps plants soak up moisture before the day gets hot. Early watering also cuts down on fungus and mildew that can show up if leaves stay wet at night. If you can’t water in the morning, late evening works, but it may increase disease risk.
For best plant health, focus water on the soil around the base of each plant, not the leaves. Wet leaves can lead to disease. Use tools like a watering can with a fine rose, a soaker hose, or even a drip irrigation system for steady and deep watering.
Use your finger to test soil moisture. Push it about 1 inch deep—if it feels dry, it’s time to water. Young seedlings need the soil to stay moist but not soaked. Mature vegetables benefit from deeper but less frequent watering.
A simple chart can help track watering:
| Crop Type | Water Frequency | Depth Needed |
|---|---|---|
| Leafy Greens | More often, shallow | 4–6 inches |
| Root Crops | Moderate, steady | 6–8 inches |
| Fruiting Veggies | Deep, less often | 8–12 inches |
Improving Drainage and Preventing Overwatering
Good drainage lets roots get the water they need without drowning. Clay soils tend to hold water and may need less frequent watering, but soak deeply when you do water. Sandy soils drain fast, so they need more regular attention.
Add organic matter like compost or aged manure to improve soil texture and drainage. Raised beds and containers help water drain better than flat garden soil and are easier to manage for beginners.
Overwatering is common and can be just as harmful as letting plants dry out. Watch for yellow leaves, wilting even when soil is wet, or moldy patches on the soil surface. These signs mean your roots aren’t getting enough air.
Use mulch (like straw, compost, or wood chips) around your plants to keep soil moist between waterings and reduce how often you need to water. Grouping pots together also helps keep them from drying out quickly, especially in hot weather.
If you’re not sure about soil moisture, always check before watering. Only water when the top 1–2 inches of soil are dry. These steps will help your garden avoid problems linked to excess moisture, keeping plants healthy and strong.
Mulching and Weed Control Practices
Mulching can keep your vegetable garden healthier by holding moisture in the soil and stopping weed growth. Choosing the right mulch and applying it correctly are simple steps that offer real benefits for your plants.
Types of Mulch for Vegetable Gardens
There are two main kinds of mulch: organic and inorganic. Organic mulches include straw, grass clippings, dried leaves, shredded bark, and compost. These break down over time, adding nutrients and improving soil structure. Straw and shredded leaves are popular choices that block sunlight from reaching weed seeds, making it harder for them to sprout.
Inorganic mulches, like plastic sheets and gravel, last longer because they do not decompose. Black plastic warms the soil quickly in spring and is handy for early crops, but it doesn’t add nutrients. Landscape fabric is often used under other materials to keep weeds down. For more details, see tips on choosing the best types of mulch for vegetable gardens.
Comparison Table:
| Mulch Type | Benefits | Drawbacks |
|---|---|---|
| Straw/Leaves | Adds nutrients, easy to use | Needs replenishing |
| Shredded bark/wood | Long-lasting, improves soil | Can attract insects |
| Plastic/Fabric | Great weed barrier, warms soil | No nutrients, cost |
Proper Mulching Techniques
Apply mulch after removing any weeds so new ones won’t poke through. Use a 2-3 inch layer of organic mulch around your vegetable plants, keeping the mulch about an inch away from stems to prevent rotting and pest problems.
Spread the mulch evenly, making sure not to pile it up against the plant stems or tree trunks. This helps air and water reach the roots and keeps the plants healthier. Check your mulch layer during the growing season and add more if it gets thin, especially after heavy rain or wind.
Organic mulches, like wood chips or straw, should be topped up as they break down to keep your weed barrier strong and maintain good soil moisture. For step-by-step instructions, read this guide on using mulch to control weeds. Regularly monitor your garden for weeds, as some may still sneak through the mulch, and pull them out when you spot them.
Supporting Plant Growth and Fertilization
Healthy plant growth depends on strong roots, steady nutrients, and proper structure. Paying attention to fertilization and plant support helps your garden stay productive and less prone to problems.
Applying Organic Fertilizers
Organic fertilizers support plant growth without harsh chemicals. Common types include compost, worm castings, and well-rotted manure. These improve soil structure and add nutrients like nitrogen, phosphorus, and potassium. Mix 2–4 inches of compost into the top 12 inches of soil before planting. You can also side-dress existing plants by placing compost in a ring around the base and gently mixing it into the soil.
Many organic fertilizers, such as bone meal (for phosphorus) or blood meal (for nitrogen), offer targeted support. Always follow package directions to avoid over-application, which can harm your plants. Consider using a soil test kit to learn which nutrients your soil needs most. For more details on preparing soil and using organic fertilizers, see these tips on soil preparation and fertilizing for vegetable gardens.
Installing Trellises and Plant Supports
Some vegetables need extra support as they grow. Trellises help keep plants like peas, cucumbers, and pole beans off the ground, making them easier to harvest and less likely to rot or suffer from disease. A basic trellis can be made with wooden stakes and garden twine. Install it before seeds sprout, or when seedlings are still small.
For tomatoes, use sturdy stakes or tomato cages to prevent stems from bending or breaking under the weight of fruit. Tie stems to supports with soft ties to avoid damage. Providing strong supports promotes better air flow and makes it harder for pests or diseases to spread. If you need more ideas, you can find several suggestions for installing plant supports and trellises.
Harvesting and Enjoying Your Vegetables
Picking vegetables at the right time and handling them properly after harvest can make a big difference in taste and nutrition. Careful harvesting and good storage help you get the most out of your work in the vegetable garden.
Harvest Timing and Techniques
Knowing when to harvest is key for the best flavor and yield. Vegetables like peas, beans, and lettuce taste best when young and tender. Root crops—such as carrots and radishes—should be firm and smooth, not cracked or woody.
Tomatoes, peppers, and cucumbers develop their richest flavors when picked at full color but before they start to get soft or split. Use clean, sharp scissors or pruners for vegetables that grow in clusters or on vines. For leafy greens, gently cut the outer leaves so the plant keeps growing.
Pick vegetables early in the morning, when they are crisp and cool. Avoid harvesting after rain, since wet leaves can bruise or spoil quickly. Handle your crops gently to avoid cuts or bruises, which can speed up spoilage.
Post-Harvest Storage Tips
Proper storage is important to keep your vegetables fresh. Leafy greens like spinach or lettuce should be washed, dried, and stored in airtight containers in the fridge. Root vegetables—including beets, potatoes, and carrots—keep best in a cool, dark, and well-ventilated area.
Remove tops from carrots and beets before storing to reduce moisture loss. Tomatoes should be kept at room temperature out of direct sunlight, while squash and onions prefer a dry, ventilated spot.
Use a table like the one below to remember where to store common vegetables:
| Vegetable | Store Where | Prep Needed |
|---|---|---|
| Lettuce/Greens | Refrigerator | Wash, dry |
| Carrots/Beets | Cool, dark place | Remove tops, unwashed |
| Tomatoes | Room temp | Keep dry |
| Onions/Garlic | Dry, airy place | Do not refrigerate |
Eat soft or spoiled produce quickly and always check for mold. For more tips on storing and enjoying your harvest, check out this step-by-step vegetable garden guide.
Frequently Asked Questions
When starting a vegetable garden, knowing the right steps, what plants to grow, layout tips, and strategies for small spaces helps you avoid frustration and get better results. Use practical planning and simple techniques to make your gardening experience easier and more rewarding.
What are the essential steps to start a vegetable garden for a beginner?
First, pick a spot in your yard that gets at least 6 hours of sunlight a day. Remove weeds, loosen the soil, and add compost to give your plants the nutrients they need.
Decide what you want to grow, then plant seeds or seedlings at the right time for your region. Don’t forget to water regularly and watch for pests.
To learn more about setup and planning, check out this step-by-step vegetable gardening guide.
Which vegetables are the easiest to grow for someone with no prior gardening experience?
Some beginner-friendly vegetables include lettuce, radishes, green beans, zucchini, and cherry tomatoes. These plants grow quickly, don’t need much special care, and bring reliable harvests in most conditions.
Leafy greens and root vegetables often thrive in both garden beds and containers. If you want more options, visit this list of easy vegetables for beginners.
What tips can help avoid common mistakes when starting a first-time vegetable garden?
Water your plants enough, but not too much—soil should be damp but not soaked. Space your plants so they have room to grow, and don’t plant too many in a small space.
Use mulch to help keep the soil moist and cut down weeds. Pay attention to sunlight and plant labels when choosing your spot and what to grow.
Get more practical advice in this garden mistake prevention guide.
How should a beginner plan the layout of a backyard vegetable garden?
Draw a simple plan of your garden space and mark where each vegetable will go. Put taller plants like tomatoes on the north or west side so they don’t shade smaller plants.
Group vegetables with similar needs together. Leave spaces for walking between rows or beds, and try not to place plants with different sunlight or water needs side by side.
Explore helpful layout tips in this garden layout guide.
Can you provide guidance on growing vegetables at home using containers?
Use containers with drainage holes, and fill them with potting soil, not garden soil. Pick vegetables that grow well in pots, such as cherry tomatoes, lettuce, peppers, and herbs.
Water more often since soil in containers dries out faster. Place the pots where they get at least 6 hours of sunlight each day, and fertilize every few weeks.
Find more details about container gardening in this beginner’s step-by-step container guide.
What is the suggested sequence for planting different vegetables in a new garden?
Start by planting cool-season crops like lettuce, spinach, and radishes in early spring. As the weather warms, plant beans, tomatoes, peppers, cucumbers, and squash.
If you want to grow fall crops, add carrots, broccoli, or kale in late summer. Check each seed packet for expected planting times based on your local climate.
You can get more details about planting times and sequences from this step-by-step guide.
Want to Grow Fresh Food at Home?
Grab the Beginner’s Guide to Thriving Gardens—your step-by-step plan to grow real food in any backyard, patio, or balcony. Perfect for first-time gardeners!
Buy the Ebook for $14Includes 7 free bonus guides • Instant download • Beginner-friendly


