How to Save Seeds from Vegetables: A Complete Seed-Saving Guide
This post may contain affiliate links. If you purchase through them, I may earn a small commission at no extra cost to you. As an Amazon Associate, I earn from qualifying purchases.
Saving seeds from your own vegetables is a reliable way to grow your favorite plants year after year and keep your garden thriving. You can save seeds by collecting them from ripe, healthy vegetables, drying them well, and storing them in a cool, dry place until you’re ready to plant next season. This simple method lets you become more self-sufficient and helps preserve heirloom varieties in your garden.
5 Quick-Start Garden Plans for Growing Fresh Food at Home (Free PDF)
Get beginner-friendly raised bed garden layout plans, simple container garden ideas, and a flexible salad garden plan you can put to work right away. Perfect for small spaces, patios, and first-season growers.
Instant email delivery • Unsubscribe anytime
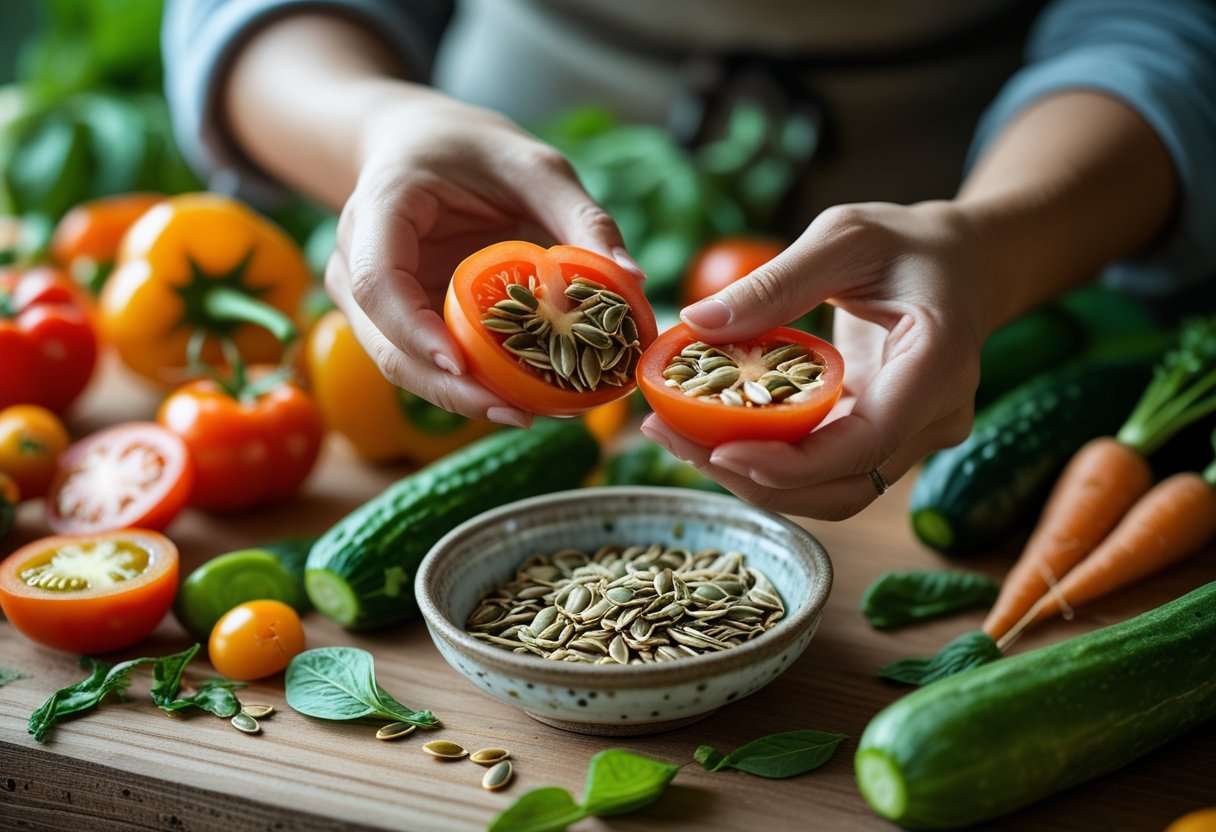
Many gardeners enjoy seed saving because it reduces costs and builds a connection with the plants they grow. You’ll also have more control over the types of vegetables you plant, which can lead to healthier, more productive gardens. If you’re interested in growing the best-tasting vegetables and sharing seeds with friends, learning these easy steps will help you get started.
Key Takeaways
- Collect seeds from healthy, ripe vegetables and dry them completely.
- Store seeds in a cool, dry place and use proper containers.
- Understanding pollination and seed types improves success.
Seed Saving Fundamentals
Saving seeds lets you control the plants in your garden from start to finish. With these basics, you can learn how to collect, store, and use seeds to grow strong, healthy vegetables every year.
Want to Grow Fresh Food at Home?
Grab the Beginner’s Guide to Thriving Gardens—your step-by-step plan to grow real food in any backyard, patio, or balcony. Perfect for first-time gardeners!
Buy the Ebook for $14Includes 7 free bonus guides • Instant download • Beginner-friendly
What Is Seed Saving
Seed saving means collecting seeds from mature, healthy vegetables in your garden so you can plant them for future harvests. Most gardeners focus on open-pollinated or heirloom varieties, which produce new plants that closely resemble the parent plant.
Hybrid varieties usually don’t produce predictable results because their traits are mixed. Open-pollinated seeds are generally preferred because you can rely on their traits year after year. Proper seed collection involves waiting until fruits or pods are fully mature before removing the seeds. You must dry the seeds fully before storing them to prevent mold or rot.
Learning how to save seeds from vegetables helps preserve specific varieties in your home garden and keeps popular traits like flavor, growth habit, and disease resistance intact. Find more details about which vegetables are best for beginners at the Old Farmer’s Almanac.
Benefits of Seed Saving
When you save seeds, you reduce your need to buy new seed packets every year. This can save you money over time, especially if you grow a large garden. Some varieties of vegetables are hard to find commercially, but seed saving lets you keep growing your favorites even if stores stop selling them.
Another benefit is protecting heirloom types and supporting genetic diversity. By saving and sharing seeds, you help keep old or unique varieties alive in home gardens. This protects them from being lost.
Seed saving also connects you more closely to the plant cycle. Paying attention to maturity, pollination, and storage develops your gardening skills and makes you more aware of what helps plants thrive. For step-by-step tips, check out this beginner’s guide to seed saving.
How Seed Saving Supports Self-Sufficiency
Saving seeds is a skill that makes your garden—and your household—more self-sufficient. Instead of relying on seed companies or stores, you create your own supply of planting material year after year.
Self-sufficiency means more than saving money. It lets you choose plants that do best in your local climate. Over time, saved seeds can adapt to your exact growing conditions, leading to healthier harvests. This helps support your family’s food security in times of change or when seeds are hard to find.
When you share seeds with neighbors or local seed swaps, you build stronger communities and help others grow their own food. For more on building a self-sustaining garden, see this guide to saving seeds.
Want to Grow Fresh Food at Home?
Grab the Beginner’s Guide to Thriving Gardens—your step-by-step plan to grow real food in any backyard, patio, or balcony. Perfect for first-time gardeners!
Buy the Ebook for $14Includes 7 free bonus guides • Instant download • Beginner-friendly
Understanding Vegetable Seed Types
Knowing the differences between seed types is key to successful seed saving. Not every vegetable seed grows the same plant year after year, and some seeds produce unpredictable or weaker plants if you save and replant them.
Open-Pollinated Versus Hybrid Seeds
Open-pollinated plants are pollinated naturally by wind, insects, or self-pollination. If you save seeds from an open-pollinated plant, they usually produce new plants very similar to the parent. Most heirloom vegetables are open-pollinated. Open-pollinated varieties are reliable for home gardeners because the seeds consistently grow as expected each season.
Hybrid seeds are made by crossing two different parent plants to boost traits like yield or disease resistance. If you save hybrid seeds, the next generation may not look or taste like the original vegetable. Hybrid seeds often don’t come “true to type,” so the plants can be unpredictable or produce poor results. If you want consistent crops when saving seeds, use open-pollinated varieties. You can read more about the differences in this guide to saving vegetable seeds.
Heirloom Varieties and Their Importance
Heirloom seeds come from plant varieties that have been grown and passed down for many generations. Gardeners value heirloom varieties for their rich flavors, unique looks, and strong local adaptation. These plants are always open-pollinated, so you can save their seeds and expect the same crop.
Heirloom varieties help keep genetic diversity in your garden. This diversity supports pollinators and can make your garden more resilient to pests and diseases. By saving heirloom seeds, you help protect rare or unusual vegetables that may not be sold in stores anymore. Many gardeners enjoy trading or sharing these seeds as a way of preserving food history.
True to Type Explained
When you save seeds from a plant and replant them, you want the new plants to look and taste like the original—this is called coming “true to type.” Open-pollinated and heirloom seeds almost always grow true to type if they’re not cross-pollinated by a different variety.
Hybrid seeds do not come true to type. Seeds from hybrids can produce plants with mixed traits, some good and some bad, or they may not grow well at all. For best results, choose seeds from healthy, typical plants that match the traits you want. It’s important to avoid saving seeds from weak or oddly shaped vegetables to keep your plants consistent and vigorous. More on keeping seeds true to type can be found in this beginner’s guide to seed saving.
Selecting the Right Plants for Seed Saving

Choosing the correct plants for seed saving helps you grow strong, healthy crops next year. You need to focus on healthy plants, the right types of vegetables, and avoiding mistakes with hybrid seeds.
Choosing Healthy Parent Plants
Always pick healthy, disease-free plants for saving seeds. These plants show strong growth, resist disease, and produce plenty of good vegetables. If you choose plants with weak growth or signs of sickness, their seeds will likely lead to weaker crops.
Look for large, well-shaped fruits or vegetables. Bright color, firm texture, and correct ripeness are good signs. Avoid plants that show odd shapes, stunted growth, or have insect damage.
The quality of your parent plant matters because vegetable seeds carry traits from their “parents.” Picking only the best means you improve your future harvest. Carefully removing seeds from strong plants lets you build up the best varieties over time. Learn more about this from this practical guide on how to save seeds from top plants.
Identifying the Best Vegetable Candidates
Certain vegetables are much easier for seed saving, especially for beginners. Self-pollinating vegetables work best because their seeds are more likely to be true to the parent plant. Top choices include tomatoes, beans, peas, and peppers. These vegetables do not require extra steps or complicated pollination control.
Many gardeners also enjoy saving heirloom seeds from open-pollinated varieties. Heirloom seeds reliably produce plants that look and taste like their parents. For most people, it is best to avoid trying to save seeds from biennials such as carrots, onions, or cabbage unless you have a lot of time and experience, since these need two seasons to make seeds.
Want to Grow Fresh Food at Home?
Grab the Beginner’s Guide to Thriving Gardens—your step-by-step plan to grow real food in any backyard, patio, or balcony. Perfect for first-time gardeners!
Buy the Ebook for $14Includes 7 free bonus guides • Instant download • Beginner-friendly
Refer to lists like the ones in the Old Farmer’s Almanac for a review of the easiest vegetables for seed saving.
Avoiding Hybrid Seed Pitfalls
Avoid collecting seeds from hybrid plants if you want predictable results. Hybrid seeds are made by crossing two different parent plants, usually for qualities like bigger fruit or disease resistance. However, their seeds often lead to mixed or poor results that do not match what you expect.
When you plant seeds from a hybrid, you may get vegetables that look strange, taste bland, or grow poorly. This happens because hybrids do not “breed true.” For seed saving, look for packets marked “open-pollinated” or “heirloom.” These will give you consistent plants year after year.
Understanding the difference between hybrid and heirloom vegetable seeds will save you trouble and increase your success. For tips on how to tell them apart, visit this quick beginner’s guide to seed saving.
Pollination Types and Their Impact on Saving Seeds

How a vegetable plant pollinates affects how easy it is to save seeds and what kind of plants those seeds will grow into. Knowing the differences between self-pollinating, cross-pollinating, and open-pollinated plants helps you plan and succeed at seed saving.
Self-Pollinating Plants
Self-pollinating plants fertilize themselves without pollen from a different plant. Popular examples include tomatoes, beans, peas, and lettuce. The pollen moves within the same flower or between flowers on the same plant, making this type very reliable for seed saving.
If you want seeds that grow into plants almost identical to the parent, these are a smart choice. You can grow self-pollinating plants close together without much risk they will cross with other varieties. This keeps the seeds pure and predictable for future crops. Saving seeds from self-pollinating plants is less complicated because you do not need to worry much about isolation distances or accidental cross-pollination. These are considered among the easiest-to-save seeds for home gardeners.
Cross-Pollinating Plants
Cross-pollinating plants need pollen from another plant of the same species to produce seeds. This usually happens through wind or insects. Common examples are squash, melons, cucumbers, corn, and most brassicas like cabbage or broccoli.
With cross-pollinators, seeds can accidentally mix genetic traits if different varieties are grown nearby. For example, if you plant several types of squash in the same garden, their pollen can mix and the seeds may not stay true to the parent. This means seeds you save might not grow into plants you expect.
To keep seeds pure from cross-pollinating plants, you need simple but important steps like planting only one variety, using physical barriers, or separating varieties by distance. Otherwise, you risk getting hybrid seeds, which can show unexpected features.
Open-Pollinated and Self-Pollinating Differences
Open-pollinated plants are those that produce seeds resulting from natural pollination by wind, insects, or self-pollination. All self-pollinating plants are open-pollinated, but not all open-pollinated plants are self-pollinating. The key feature is that seeds from open-pollinated plants usually grow into plants that closely resemble their parents, as long as cross-pollination with different varieties does not occur.
Here’s a quick comparison:
| Type | Pollination Method | Seed Outcome |
|---|---|---|
| Self-Pollinating | Own pollen, same flower | True-to-type plants |
| Open-Pollinated | Self or natural cross | True-to-type if isolated |
| Cross-Pollinating | Pollen from another plant | Mix or hybrids |
Choose open-pollinated seeds when you want plants to stay the same each year. Avoid saving seeds from F1 hybrids, as they can be unpredictable. Learn more about open-pollinated varieties and seed saving to keep your garden plants consistent and reliable.
Preventing Unwanted Cross-Pollination
When saving seeds, it is important to keep your vegetable varieties pure. Using the right methods can help you avoid unwanted cross-pollination and make sure the seeds you save grow into the plants you expect.
Isolation Techniques
Keeping distance between different varieties of the same crop is one of the most effective ways to prevent cross-pollination. This is especially important for cross-pollinating plants like corn, squash, or melons.
For self-pollinating vegetables, such as tomatoes or beans, you generally only need to separate varieties by 10 to 20 feet. Cross-pollinating vegetables, like spinach or corn, may need hundreds of feet or more between varieties. In some cases, saving seeds from only one variety per season will give you the best results.
You can also stagger planting times so that different varieties do not flower at the same time. This reduces the risk of their pollen mixing. Learn more about isolation through recommended isolation distances and timing.
Physical Barriers and Row Covers
If space in your garden is limited, you can use physical barriers such as isolation cages, row covers, or blossom bags to keep pollen from spreading between plants. These barriers work well for insect-pollinated crops, like eggplant, peppers, or cucumbers.
Isolation cages are lightweight frames covered with fine netting or mesh. These allow sunlight and air in, but block bees and other pollinators from moving between varieties. For some plants, you will need to hand pollinate while they are inside the cage.
Row covers are sheets of fabric placed over your plants during flowering. This method can be an easy and affordable way to reduce cross-pollination in a small garden. For flowers or branches, use blossom bags to cover individual blooms.
Physical barriers are less effective for wind-pollinated crops, since wind can still move pollen into and out of the covered space. They are best used for vegetable plants pollinated by insects. More details on using physical isolation methods are available.
Hand Pollination Methods
Hand pollination lets you control exactly which plants breed together. You can use this to make sure your seeds stay true to type, even if several varieties grow nearby.
To hand pollinate, cover the flowers before they open using bags or netting. When you see a flower about to open, remove the bag, gently transfer pollen from the selected plant’s flower to the target flower using a small brush or cotton swab, then recover the flower to prevent stray pollen from reaching it.
This method is common for squash, pumpkins, and corn. While it takes time and care, hand pollination removes the chance of insects or wind carrying in pollen from other varieties. You can find step-by-step instructions for these hand pollination steps.
Knowing When Seeds Are Ready to Harvest
Harvesting seeds at the right time helps keep them healthy and increases your chance of strong germination. Watching for signs of maturity and handling seeds with care helps you get the best results for replanting.
Signs of Seed Maturity
Look for clear changes in your vegetables to know when seeds are ready. For peas and beans, wait until the pods turn brown and dry out on the plant. The seeds inside should be hard, not soft or green.
With peppers, the fruit needs to reach its full color—red, yellow, orange, or purple—before picking. The seeds inside are mature when the pepper starts to shrivel. If you want to save tomato seeds, wait until the fruit is fully colored and soft, but not overripe or rotting.
Cucumbers and squash are different. Wait until the fruit is past the point where you would eat it. Cucumbers turn fully yellow and squash skins get very hard. For melons, harvest when the fruit slips easily from the vine and the stem looks dry.
Table: Examples of maturity signs
| Vegetable | Maturity Sign |
|---|---|
| Peas/Beans | Brown, dry pods |
| Tomato | Full color, slightly tender fruit |
| Pepper | Full color, starts to shrivel |
| Cucumber | Skin fully yellow |
| Squash | Hard rind |
Check daily, as waiting too long can lead to lost seeds or lower quality. See more detailed tips on identifying maturity at this garden seed guide.
Harvesting for Optimal Germination Rates
To keep your seeds healthy and increase germination rates, handle each step carefully. Always choose seeds from the healthiest, most productive plants. Avoid harvesting from weak or diseased vegetables, as these can lead to poor growth next season.
Remove seeds with clean hands or tools and dry them thoroughly before storage. For most seeds, such as beans and peas, leave them to air dry in their pods for several days in a warm, dry spot. Spread out smaller seeds—like peppers or tomatoes—on a clean plate in a single layer so they dry evenly.
If harvesting is done too soon, you risk immature seeds that may not sprout. Too late, and pests or mold could damage them. Squeeze or press a dried seed gently with pliers; a fully dried seed will shatter, while an under-dried one will crush or feel soft.
Proper selection and drying means you are more likely to have seeds that sprout quickly and grow strong when you plant them next year. For more techniques and drying methods, check this complete guide to seed saving.
Step-by-Step Guide to Harvesting Seeds
Saving seeds from your vegetable garden helps you preserve your favorite varieties. The method you use depends on whether you are working with dry or wet-fruited vegetables.
Harvesting Seeds from Dry Fruits and Pods
For vegetables such as beans, peas, lettuce, and most flowers, let the pods or seed heads mature and dry out on the plant as much as possible. Wait until the pods are fully dry and the seeds rattle inside. The pods should split or crack open easily.
Pick the dry pods during a clear, dry day to avoid raising the moisture level of the seeds. Place the pods in a paper bag or a shallow box to finish drying indoors if weather is wet or humid. Once dry, you can separate the seeds from the pods by hand or by gently crushing the pods.
Use a screen or colander to help remove any remaining debris or chaff. Good air circulation while drying is important to prevent mold. Check that the seeds are hard and dry before storage—if you can dent them with your fingernail, they need more drying time.
Label each batch with the vegetable name and harvest date. Store your seeds in paper envelopes or small glass jars, then keep them in a cool, dry location to preserve viability. Learn more on saving seeds from OSU Extension’s step-by-step guide.
Harvesting Seeds from Wet-Fruited Vegetables
Vegetables like tomatoes, cucumbers, squash, and melons have seeds that are surrounded by wet pulp. To harvest seeds from these, scoop them out of ripe fruit. For tomatoes and cucumbers, place the seeds—along with their attached pulp—into a bowl or jar with a little water.
Let the mixture ferment for 2-4 days. Stir it daily. This process helps break down the gel coating around the seeds and controls some diseases. Good seeds will sink to the bottom, while bad seeds and pulp will float.
Pour off the water and floating material, then rinse the good seeds in fresh water several times. Spread the clean seeds in a single layer on a plate, tray, or screen to dry. Stir each day so they dry evenly and don’t stick together.
When seeds are dry and hard, place them in a labeled envelope or jar and store in a cool, dry place. For step-by-step details, visit this comprehensive seed saving guide.
Cleaning and Drying Collected Seeds
Cleaning and drying seeds is important to prevent mold, pests, and poor germination. Your method depends on the type of vegetable seed and how it is held inside the fruit or pod.
Wet Method for Pulp-Filled Seeds
Use the wet method for seeds from vegetables that have a jelly-like pulp, such as tomatoes, cucumbers, and squash. These seeds are surrounded by a slippery or sticky coating that you need to remove before drying.
First, scoop the seeds and pulp into a bowl or jar. Add a little water and stir. Let the mix sit for 2 to 4 days. During this time, good seeds will sink, and bad seeds and pulp will float. Fermentation breaks down the coating and helps kill some diseases.
Pour off the floating material and rinse the seeds several times with clean water. Use a fine strainer to catch the seeds as you rinse. Once clean, place the seeds on a plate or coffee filter to dry in a single layer, away from direct sunlight. Stir daily to avoid clumping. Seeds should be fully dry before storing. Learn more about cleaning tomato and cucumber seeds with the wet method.
Dry Method for Pod and Husk Seeds
Use the dry method for seeds inside pods or husks, like beans, peas, lettuce, and peppers. These vegetable seeds are easier to handle because they often dry naturally on the plant.
Wait until the pods or seed heads turn brown and brittle. Pick them on a dry day, then break them open over a clean surface. Gently separate the seeds from any extra material or chaff.
For very small or dusty seeds, pour them from one bowl to another in front of a gentle fan to blow away debris. Spread the cleaned seeds on paper in a thin layer. Let them air dry for about 7 to 10 days, away from moisture and sunlight. Once they break in half rather than bend, they are ready to store. For more tips, see how to process and store podded seeds at this guide to harvesting and storing seeds.
Proper Seed Storage for Longevity
To keep the seeds you save from your vegetables strong and ready to grow, it is important to store them in the right way. Careful storage helps seeds stay viable for longer, reducing waste and ensuring good results during planting.
Best Storage Conditions
Seeds last much longer when you keep them in conditions that are cool, dry, and dark. High humidity or warmth can cause seeds to sprout early or grow mold, which ruins their ability to germinate. Aim for a storage temperature of around 35–40°F (2–4°C). A refrigerator or dedicated beverage cooler can work well if you seal the seeds in airtight containers.
Reduce moisture by using silica gel packets or dried rice in your storage boxes. This absorbs any excess humidity. Always avoid keeping seeds near heat sources or in damp areas. Strong light can also lower seed quality, so use opaque boxes or keep your storage area dark. Learn more about ideal storage with this in-depth guide to storing seeds.
Labeling and Organizing Seeds
Keeping your seeds labeled and organized makes planting easy and reduces mistakes. Use small paper envelopes, coin envelopes, or resealable bags for each type of seed. On each packet, clearly write the plant type, the variety, and the date you collected the seeds.
Sort and store your labeled packets in a photo box, airtight plastic container, or glass jar. You might organize by plant type, planting month, or year collected. Creating a simple chart or log can help track which seeds need to be replaced more often. This system keeps your collection tidy and makes seeds easier to find when you need them.
Saving and Sharing Flower Seeds
Saving flower seeds allows you to keep your favorite varieties growing year after year and share them with friends. Knowing which flower seeds to save and how to collect them gives you the best results.
Which Flower Seeds to Save
Select seeds from non-hybrid, open-pollinated, or heirloom flowers for the highest chance they will grow true to type. Common easy flowers for beginners include marigolds, zinnias, sunflowers, cosmos, and calendula. These plants produce seeds that are simple to collect and usually grow well in different gardens.
Focus on healthy, mature plants. Avoid collecting seeds from any flower that showed signs of disease or stunted growth. Heirloom and open-pollinated types ensure that the next generation of flowers will strongly resemble their parents. Hybrids may not produce the same results and sometimes lead to disappointing blooms.
Some flowers, like petunias and snapdragons, can also be grown from saved seeds, but may not always come back true in color or form. For a helpful list of which varieties work best, see this guide to saving flower seeds.
Techniques for Collecting Flower Seeds
Timing is important when harvesting seeds. Allow flower heads to dry fully on the plant before picking. Dry heads ensure seeds reach full maturity. For most annuals, like marigolds or sunflowers, the seed pods or heads start to dry and turn brown.
Carefully cut the dry seed heads and place them in a paper bag or envelope. Gently tap or shake out the seeds onto a clean surface. Separate the seeds from bits of chaff and dry them on a paper towel for a few days.
Label each envelope or container with the flower name and date. Store them in a cool, dry place. With proper care, many flower seeds stay viable for several years. For more on these methods, visit step-by-step tips on saving seeds.
Evaluating and Improving Germination Rates
Checking how well your saved seeds sprout is important to make sure you use your garden space and time wisely. If your seeds aren’t sprouting well, you’ll want a plan to boost their success before planting more.
Simple Germination Testing
Testing germination at home is easy and gives you clear results. Take at least 10 seeds from your batch and place them on a damp paper towel. Fold the towel, put it in a plastic bag, and leave it in a warm spot.
After about 7 to 10 days, count how many seeds have sprouted. To find your germination rate, divide the number of seeds that sprouted by the total number you tested, then multiply by 100 for a percentage. For example, if 8 out of 10 seeds sprout, that’s an 80% germination rate.
Recording these rates helps you know which seeds are most likely to grow, allowing you to adjust how many seeds you plant for a good harvest. If the rate is low, you’ll want to plant extra seeds.
You can learn more about evaluating seed germination rates and why it matters to successful planting.
Revitalizing Older Seeds
Older seeds often have lower germination rates, but you can still use them by helping them sprout better. Soaking seeds in warm water for a few hours softens the seed coat and speeds up germination. For even better results, add a small amount of hydrogen peroxide to the water to boost oxygen, which seeds need to grow.
Scarification works for tough seeds—lightly nick or sand them to allow moisture inside. For certain types, like some perennials, a process called cold stratification (chilling seeds in a fridge) may be needed to mimic winter.
If you notice dropping germination rates in older vegetables like beans or peas, plant more seeds than you need. This ensures you still get enough healthy plants even if some seeds do not sprout. See more tips to improve and speed up seed germination using these proven techniques.
Frequently Asked Questions
Learning how to save seeds from your vegetables helps you reuse quality plants every season and save on gardening costs. Proper seed collection, cleaning, and storage protect germination rates and preserve your favorite varieties.
What is the correct method for harvesting seeds from fruits and vegetables?
You should only harvest seeds from mature, healthy fruits or vegetables. Open-pollinated types are best because hybrid seeds may not produce true-to-type plants. Remove the seeds from ripe produce, then clean and dry them well before storing to keep them viable for planting.
For beans and peas, allow the pods to dry and brown on the plant before opening them to collect the seeds. With peppers, wait until they reach full color before removing seeds. Melons and cucumbers should be fully ripe before scooping out seeds.
Can you explain the process for saving tomato seeds for future planting?
To save tomato seeds, first choose a ripe tomato from an open-pollinated variety. Cut it open and scoop out the seeds along with the surrounding gel. Place the seeds and gel in a small container with some water.
Let this mixture sit at room temperature for a few days, stirring daily. When a layer of mold forms, viable seeds will sink to the bottom. Pour off the liquid and rinse the seeds thoroughly. Spread them out on a plate or screen to dry for several days before storing. You can find more tips about saving tomato seeds at the Old Farmer’s Almanac seed-saving guide.
What type of container is best for long-term storage of saved seeds?
Saved seeds should be stored in airtight, dry containers. Glass jars, pill bottles, or sealed plastic bags work well for most seeds. Keep the containers in a cool, dry, and dark place to extend seed life.
For small seeds, like lettuce or tomato, pill bottles are effective. Larger seeds, like beans, can be kept in snack canisters or jars. Label your containers with the seed type and harvest date so you remember what is inside.
Could you provide a step-by-step guide for beginners on seed saving?
- Choose healthy, mature fruits or vegetables from open-pollinated plants.
- Collect the seeds and remove any pulp or debris.
- Wash seeds carefully if needed.
- Dry the seeds completely on a plate or screen away from direct sunlight.
- Test dryness by pressing the seeds; they should be hard and not soft.
- Store the dry seeds in labeled, airtight containers.
If you want a full practical rundown, visit the Old Farmer’s Almanac how-to on saving vegetable seeds.
What are the drying times and considerations for seeds before they are ready for storage?
Seed drying times depend on the type and size. Beans and peas usually take about six weeks of air-drying. Tomato and cucumber seeds can take a week or two, while squash and melon seeds may need several days.
Test dryness by pressing the seed with pliers or a tool; if it shatters, it is dry. Seeds should not feel soft, spongy, or bend easily. Proper drying is key to preventing mold and rot in storage.
How does one effectively collect and preserve seeds over the winter for next year’s garden?
After collecting and drying your seeds, put them in airtight containers and store them in a cool, dry, dark place. Many people use refrigerators or freezers for extra-long storage, especially for seeds from plants like tomatoes or beans.
Label your containers, and check the storage area for moisture or high temperatures. For more tips on storing seeds for future use, see this guide on storing unused seeds.
Want to Grow Fresh Food at Home?
Grab the Beginner’s Guide to Thriving Gardens—your step-by-step plan to grow real food in any backyard, patio, or balcony. Perfect for first-time gardeners!
Buy the Ebook for $14Includes 7 free bonus guides • Instant download • Beginner-friendly

